This was quite a whirlwind project. I had a specific deadline which left me about 10 days to complete it (which is about two or three days fewer than I would normally take for a piece this size). I documented my daily progress below. The quality of the photos aren’t great since I was moving pretty quickly.
Day 1: I roughed out the composition and got started on the rose border. In the lower left I started to fill in the space between the flowers. It’s hard to see, but I initially had more stems and thorns. After sketching it out, I realized I didn’t like this approach. I didn’t want the image to look excessively “thorny” and hard, so I toned this quality down in the border.

Day 2: At this point I was already getting a little sick of drawing roses. It’s a good thing I only had eight more days of it to look forward to…

Day 3: Detailed the bride.

Day 4: Everything is drawn in, including the assortment of bugs in the border (honey bees, cicadas, and grasshoppers).

Day 5: Ink outlines.

Day 6: Erased the pencils and ameliorated the bride (heh).

Day 7: Final inks on the flowers and bugs.

Day 8: Oy. Went in and detailed. Every. Single. Leaf.

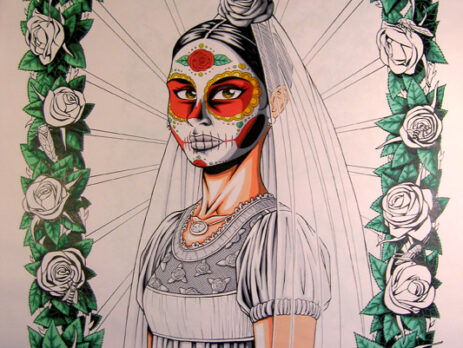
Day 9: Finished coloring all the leaves and most of the bride.

Below is the completed marker-colored drawing:

Day 10: Finished up with the markers, scanned, and proceeded to retouching in Photoshop. The orange and yellow background was done digitally, as well as the overall tone and texture of the image. The color palette was more restricted as compared to the last Day of the Dead I had done (no blues or purples). Frankly, I was amazed that I finished this whole thing in time. More than that, I’m impressed that I didn’t cut any corners or sacrifice any quality during the rush.
